a mouthful of curdled milk

yeah, that was just my ploy to get you to read this. while i did just take a swig of milk that turned out to be curdled (really, whole foods? after a week?), this post is really about caramel. but first, let me tell you – curdled milk is disgusting. look before you leap, i guess.
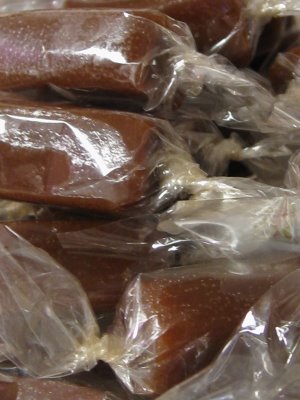
i have made five batches of caramel things thus far – two sauces (to find the recipe, search for “caramel sauce” within this blog), and two batches of caramel candy. what’s not to love about caramel? chewy but soft, sweet but not tasting completely of sugar. well, tasting of caramelized sugar. lusciously caramelized sugar. i hadn’t ever made caramel before last weekend, beyond the occasional batch of melted sugar for cake decorations or creme caramel. caramel is special because in addition to the sugar, it includes cream and butter. and, dear readers, after three tries, i have attained success with caramels. the first batch was delicious, but so soft that it refused to part from the aluminum foil i poured it onto without a bit of a battle. i won the battle, but the caramel won the war because it was all lumpy and unattractive looking. but i guess i won the meta-war because i rolled it out onto my leftover ganache, and now it’s all cut up in a tupperware, waiting to be dipped in tempered chocolate. so HA, soft caramel. i win.
the second batch…well, since the first batch was too soft, i thought i’d try some different temperatures to cook the caramel at. and i wasn’t watching that closely, and by the time i took it off the stove, it was at 270F like i wanted (the original recipe specified 250F), but it definitely smelled burned. i poured it off into a pan lined with wax paper anyway, and this i regret. i really doubt that i will be able to part the wax paper from the caramel. however, this is fine by me: the butter separated slightly from the sugar and has formed waxy little pools on the surface of the caramel, and it still smells slightly burned. if you like burnt caramel in candy form, …fortified with a bit of wax paper, let me know.
i have to admit that i felt a little defeated when i thought about making a third batch. but lo and behold, while indulging in some retail therapy (school is hard, you know), i saw a silicone loaf pan on sale at crate and barrel. and now you know my dirty secret: i own a silicone baking pan. hypocrite, you say? you remember all of those times i railed against silicone baking pans because you only get true browning action with real, not-nonstick pans? well, a girl needs her caramel. and the sanity that comes along with making caramel correctly. besides, i’m not actually baking anything in the pan.
and this third time, everything ended up perfectly: this caramel is not oozing butter, is not too soft, is not sticking to anything but itself. i haven’t actually tasted it yet, but the sheen on this caramel is the sheen of…well, caramel. i would say something nice about silicone, but then i’d have to add a catty disclaimer. everything is as it’s supposed to be, and all is well.
caramels
(adapted from foodbeam, one of my favorite blogs)
180g sugar
20g water
70g glucose syrup (or corn syrup)
45g butter
200g heavy cream, scalded (heated until it simmers)
a silicone loaf pan (or other pan of similar size)
1. if you haven’t already, take the butter and cream out of the fridge and let them come to room temperature. combine the sugar, water, and corn syrup in a medium saucepan with a thick bottom. stir with a rubber spatula to combine completely, then heat on medium until the mixture is bubbling thickly and has turned a medium amber. don’t stir; if you have a compulsive stirring complex like me, then you can swirl the sugar around the pan now and then. don’t worry, you can stir later.
2. when the sugar has started to bubble, start heating the cream on medium low in a small or medium saucepan with a thick bottom. the sugar should take about 15 minutes longer or so (this can vary a lot) to caramelize to the proper amber color. don’t stir the cream either. when the cream starts simmering, turn the heat to low. if you’re afraid it’s going to burn, turn the heat off.
3. alright, so now the sugar should be amber and bubbling, and your cream has been scalded. take the sugar off the stove and add the cream and butter. stir until it’s all mixed together, then put it back on the stove. keep the heat at medium and let the mixture boil and do its thing until it registers 255-260F on a candy thermometer. it should hold that temperature pretty well – not fluctuate from 245-255F – or it won’t solidify correctly, or so my tests seem to indicate. you should give it a stir every now and then to make sure nothing burns; if your stove tends to run hot, you might want to use medium-low to boil the mixture.
4. pour the caramel into the pan. let it set for 3 hours, and you’re good to go. you can slice the caramel with a sharp knife (to get the prettiest, cleanest cut), or a regular dinner knife if you just want to eat some.
[makes a loaf-pan shaped bar of caramel, about 5/8″ thick]